If you’re anything like me, you’re likely to be caught in the kitchen — late at night — eating peanut butter straight out of the jar. And as you well know, PB isn’t the only kid on the block these days (though it’s been reported, Americans eat 700 million pounds of it annually); you can get virtually anything made into a butter now (looking at you, granola butter).
Despite being a centuries-old treat, nut butters have exploded in popularity in recent years, with the market as a whole projected to grow 7% in the next few years. Cashew, almond, macadamia, pecan, and even sunflower butter (not even a nut, really… but then again, neither are peanuts!) have entered the health food stratosphere thanks to their nutritional profile and, frankly, their flavor. They really do taste good.
Not all nut butters were created equally, however — and we mean this literally! If you’re not cautious when it comes to the ingredient label, you could end up with a food that’s been ‘health washed’ (labeled and marketed to appear healthier than it really is) but contains ingredients that aren’t necessarily optimized for your nutritional needs. Think: refined oils and sneaky sugars. This isn’t to scare you or tell you that your favorite nut butter might be making you sick or unhealthy, simply to give you the power, the insight, and the tools to make the best decision for you.
Beyond any health and nutrition concerns, we’ve also got the price factor. With rising popularity also comes rising costs, particularly now when inflation is out of control. And, there are some super pricey options out there. $75 for four 6oz jars of almond butter isn’t exactly a bargain buy, and many options ring in at over $20 a pop (one of my favorites is actually $30!).
So to tackle both the price and the health topics in one fell swoop, we decided to test out making some DIY nut butters ourselves. As a PB enthusiast, I volunteered to tackle this project, using my Vitamix and my love of spreads as guiding lights in my at-home experiment.
The Basics on Making Homemade Nut Butter

Before we get into the next steps, let’s get to the basics of how nut butter is made. In some cases, it’s one ingredient: nuts.
Single-ingredient nut butters are the ones you have to stir (think: your fav organic variety from Whole Foods or Trader Joe’s). The ones that have an even, creamy, stir-free consistency tend to have a second ingredient: oil. Depending on your personal preference and health needs, this may (or may not!) be the best ingredient for you, so take that into account. Some iterations of these recipes also contain salt and/or sugar, which obviously carry their own pros and cons.
But at its core, you can make nut butter (typically) with a single ingredient and a powerful blender or food processor. In order to make them more ‘blendable,’ many recipes call for roasted nuts so they break down more easily, releasing their own natural oils, allowing you to blend up a butter without breaking your kitchen equipment (a broken Vitamix, friends, would be a very expensive almond butter).
Tips:
- It’ll look like powder at first. Keep going (and using a pulse feature, scraping down the sides if you have to), and eventually, it *should* turn into a dough-like paste, and eventually something more spreadable.
- To avoid your spread getting “stuck” in the blender, double or triple the recipe. Having more to blend can help the powder transform into a butter more quickly!
- If it really isn’t turning into a spread, you can add oil — either the same oil as the nut (i.e., almond oil, peanut oil) or a neutral oil like coconut.
- Some pitcher attachments work better than others if you’re using a blender! If you have a food processor, you may have an easier time.
Kitchen Supplies Needed
Grinding tool: You’ll either need a food processor or a blender to make this happen (unless you’re ready for some manual labor, in which case a molcajete and several hours of grinding-by-hand may work). If you want to go the post-industrial-revolution way (like I did), a high-speed blender will do the trick. I happen to have a Vitamix 750 — my old faithful — which is what I used to make the following five recipes.
Spatula: In my case, the structure of my Vitamix pitcher has a wide base, and I needed a silicone spatula to scrape down the sides pretty consistently throughout each recipe. This will vary based on what you’re using to grind.
Tupperware: A place to store your new spreads when you’re done!
Beyond that, you’ll just need your ingredients and possibly a little oil if your butter isn’t as ‘buttery’ as you’d like it (or if it’s getting stuck to the sides and won’t blend).
The Benefits of Making Homemade Nut Butter
As noted, the biggest benefits of doing this DIY are controlling costs and ingredients. In addition, cooking can be a wonderfully therapeutic activity, particularly if you enjoy spending time in the kitchen. You can also make this a group or family activity and experiment with different flavorings (Maybe some vanilla extract? Cinnamon? Cacao Powder? Who knows!) and get creative. One part cost-effective health consciousness, one part fun project.
And we know now that health is not about a single, universal metric; it’s not about calories or macros like fat and carbs or eliminating certain foods. It’s about what works for your body, what is most nutritionally optimal for you, and what meets your needs. It’s also about getting more whole, minimally-processed foods into your diet whenever you can! In this case, a whole peanut or almond, minimally processed into a butter (one step: blending — true minimalism), hits that mark pretty well.
The 5 Healthiest & Least Expensive Ways to Make Nut Butter at Home
KEEPING IT SIMPLE
The first two recipes? Basic, basic, basic. One ingredient, straightforward process, delicious(ly versatile) results. I decided to start with the basics for a few reasons — for one, it’s the easiest and most health-conscious method. And two, the first recipe I found on the Vitamix site was for plain almond butter (I’m new to this too, you guys!).
Simple Almond Butter

All you need is roasted almonds and — as mentioned — a strong blender or food processor. One tip I found: if you roast the almonds yourself and blend them warm, they may blend more easily than room temperature almonds from the store.
Add your dry roasted almonds to your blender of choice, start slow, crank up the speed, and let it rip. Your pulverized almonds will eventually purée to the point of becoming a smooth butter. Nature is beautiful.
Almond benefits:
- High fiber
- High protein
- Rich in vitamin E and magnesium
- Loaded with antioxidants
Simple Peanut Butter

I found an inspiringly simple and beautifully photographed recipe from Pinterest for straight-up peanut butter, sans added oil. It’s wild because it seems to be peanut powder at first, but if you keep blending, the oils eventually release!
Peanut benefits:
- High fiber and protein
- High protein (rich in BCAAs, or branched-chain amino acids, which help with exercise recovery)
- Rich in vitamin E and magnesium
- Loaded with antioxidants
GETTING CREATIVE
Coconut Peanut Butter

My personal favorite, the inspiration from this one, comes from my fav farmer’s market nut butter in San Diego (I buy tons of jars of the stuff). I wanted to give it a whirl (literally) on my own, and I was not disappointed!
Ingredients: peanuts and coconut.
I got dry roasted peanuts and coconut flakes from the grocery store. Advice from different sites recommended blending the peanuts until smooth first, then adding coconut. I’m glad I followed this advice because it went so smoothly (literally, again).
Coconut benefits:
- High in manganese
- May improve cholesterol levels
- Loaded with antioxidants
- Contains protein and fiber
Pistachio Butter
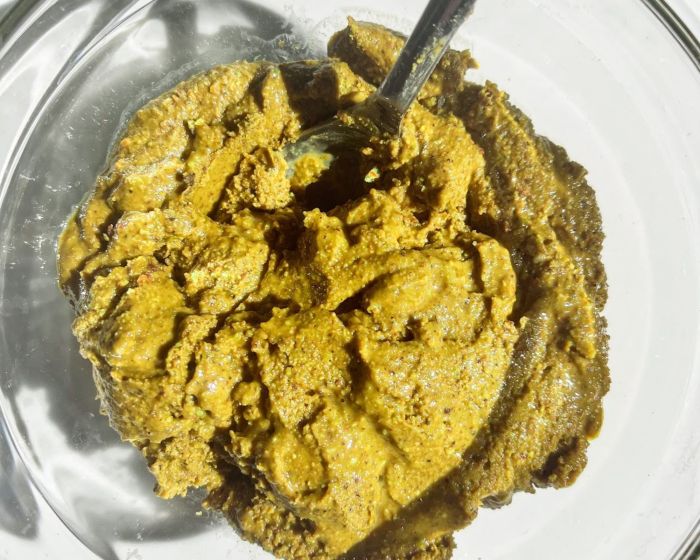
I’ve been reading about the benefits of pistachios lately and growing up eating pistachio gelato and spumoni (any other Italian-American friends out there??) I wanted to create a healthy version of my favorite childhood treat.
You can make pistachio butter with just pistachios (I’d recommend getting no-shelled, roasted pistachios to avoid extra labor), or add in salt, honey, maple, coconut sugar, vanilla — whatever your heart desires.
Pistachio benefits:
- One of the best sources for vitamin B6
- High in potassium
- High fiber and protein
- Loaded with antioxidants
- Low calorie
SPICING IT UP
Cinnamon Maca Almond Butter

At this point, I decided to get spicy and up the ante recipe-wise. My favorite $30 nut butter is a superfood spread containing maca, cinnamon, vanilla, coconut sugar, and almonds. Knowing I could get all these at the grocery store made it a little more accessible.
I already had cinnamon, vanilla, and almonds (from my other nut butters) but needed maca and coconut sugar. Maca was about $6 per bag, and coconut sugar was just over $4. So this one required $10 in extra ingredients — but I was using a fraction of each bag. Maybe $0.50 total? So the initial buy-in was pricier, but the recipe itself? Wayyyy cheaper than buying store-bought.
I used the simple almond butter recipe above and, once blended smooth, added in my *pizzazz* little by little. This is the whole ‘add to taste’ portion of the recipe.
- May support reproductive health for men and women
- May improve mood and energy
- Loaded with antioxidants
They All Were Delicious, But One Was My Favorite
We probably all saw this coming, but my favorite continues to be the coconut peanut butter — truly one of my favorite foods all around. It was so fun to get to make it at home, too!
Conclusion: Easy, Fun, Affordable, Healthy
In sum, this experiment showed that if I have a few extra minutes and some roasted nuts on hand, it’s easy to make delicious, healthy spreads in a snap with the touch (okay, several touches) of a button on my blender. There are so many ways to customize and enhance homemade nut butters, and this will definitely be a part of my meal prep and cooking going forward. Definitely try this one at home!
